
The Western Skiff is a 14-ft. rowing/sailing boat, designed by Nigel Irens and Ed Burnett. The skiff has classic lines, reminiscent of traditional small fishing dories, but is made with modern materials. While originally sold as a kit with pre-cut parts, the plans are now made available through the website of Practical Boat Owner magazine. When these plans were made available and the kit was put back into production, the magazine featured an article on the boat’s history and an open invitation for anyone to build one of their own.
Building my own boat, that struck a chord for me. After building a skin-on-frame kayak, I was ready for a more serious building project and found myself browsing through various plans and models. I wanted a model which was small enough to sail single-handed, but big enough to carry 3 or 4 persons. The boat should not sail too fast, because the local waters are not that extensive, but fun to sail and potter around with. The Minahouet by Vivier design looked promising, but I couldn’t help comparing every design and plan to that initial small skiff. Thus, The Western Skiff it was!
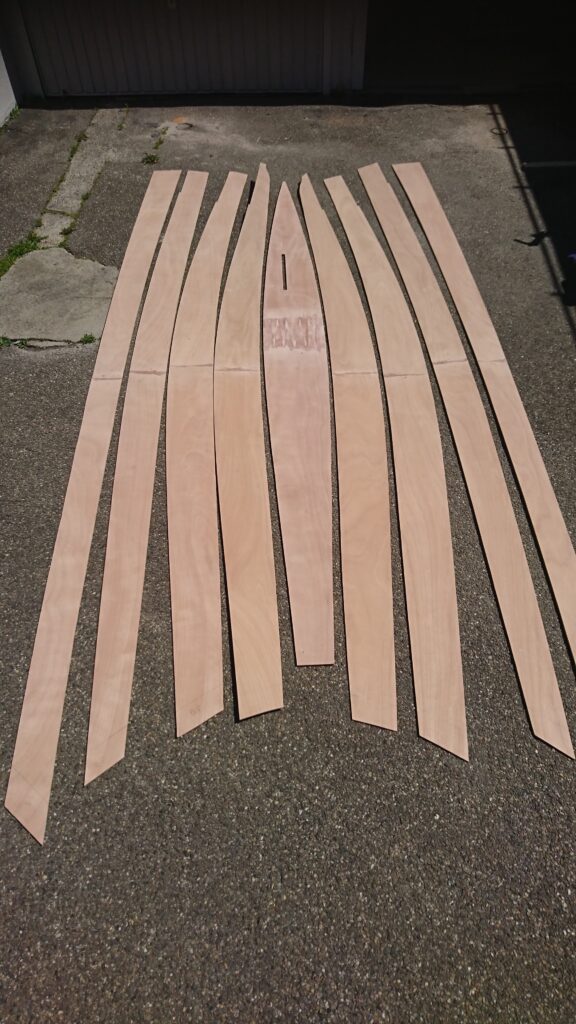
To start the build, I plotted the plans and bought a stack of plywood. For about a month or two, planks, tools and boatparts-to-be lingered around the house. Then I luckily found a garage nearby to set up my workshop. In the garage I started assembling the planks and building jig. With the frames positioned on the jig, the outlines of the boat started showing. The first planks were the hardest to put on the frames with a nasty twisty bit at the front, but the following planks were much easier.
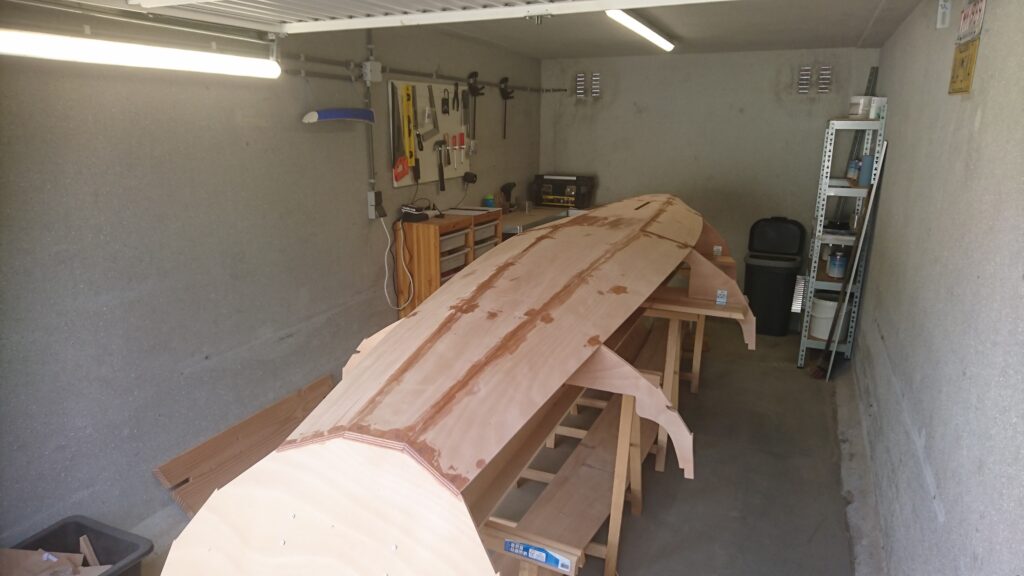
The bottom needed additional reinforcements, glassfiber as per the instruction. However, following my research on composite materials, I did not want to mix glass and wood. Instead, I used flax fibres and biobased epoxy as reinforcements. Changing materials however, also meant changing the manufacturing process. Unlike glass, flax absorbs resin and will subsequently swell, leading to poor wetting out of the fabric and an unfavorable resin/volume fraction. Thus, a more controlled means of applying the epoxy was needed.
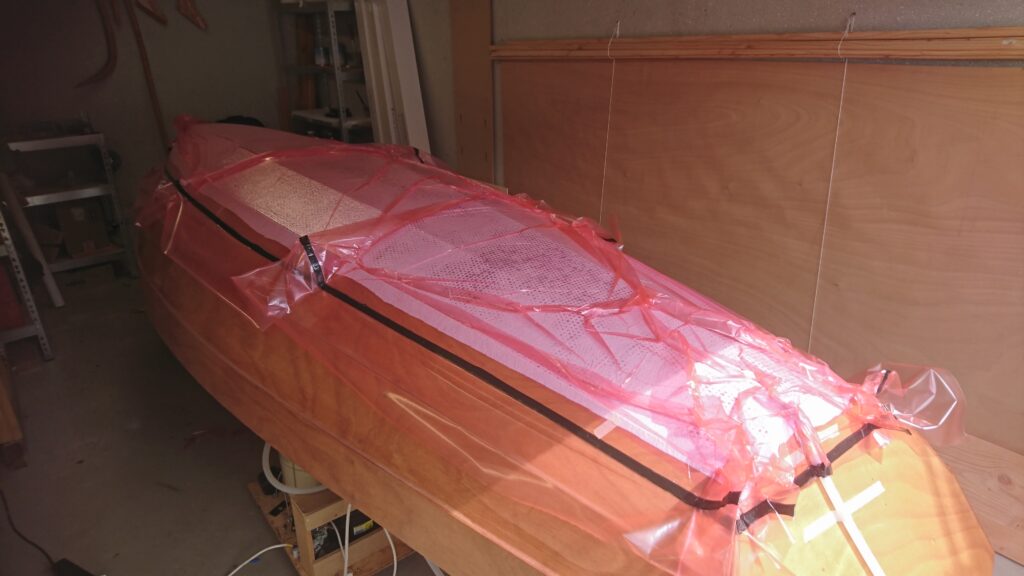
To control resin uptake by the flax fibres, I decided to go for the vacuum-assisted hand layup method. We used this technique often to produce parts for Nuna5 and it is easier to control than vacuum-infusion. From various instructables and how-to guides I built my own vacuum pump and collected all necessary foils and tapes. After a handful of test samples I went ahead and laminated the bottom.
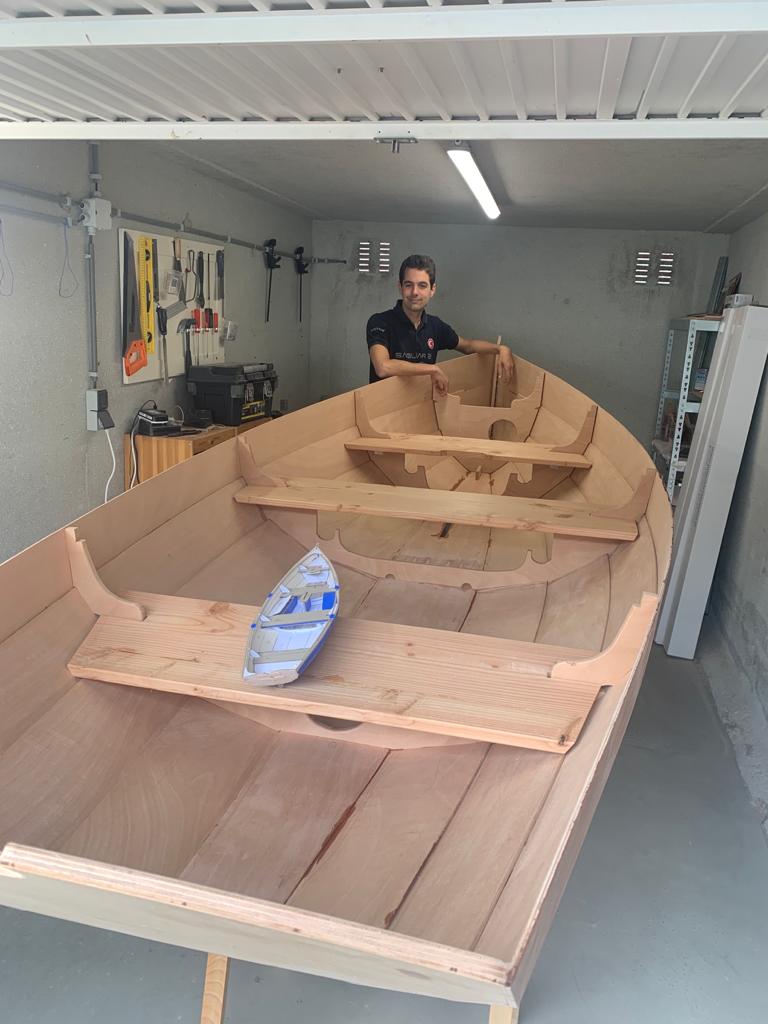
With the hull complete it was time to work on the interior: bouyancy tanks, thwarts, a dagger board case, inwhales and gunwhales found their place. By now, the boat was pretty much complete and ready for finishing. The interior received a 2-pack clear coat, the exterior a stylish capri-blue. The only tasks remaining was fitting out and launching.
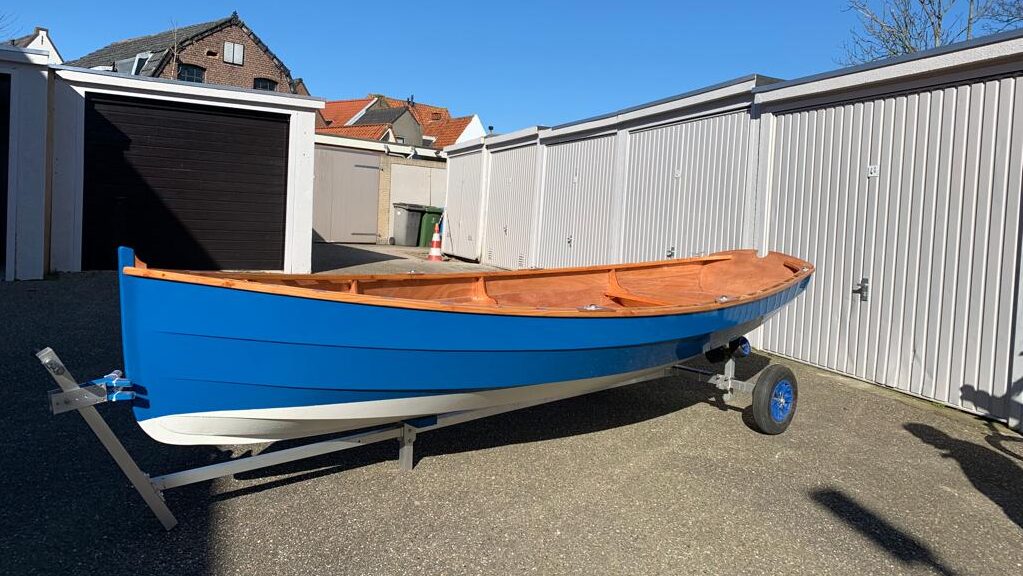
About one year after the plywood entered the house the boat was ready to go to the water. With the help of a friend she was launched in the nearby canal. Since, we’ve enjoyed numerous trips along the inland waterways. The skiff rows beautifully and offers space to two or three crew. To get under sail in the same season, I assembled a rig from parts found on the sailing club’s attic and second-hand sails. Although functionally sound enough to play around, a new set of spars and sail is in the making.
